Sheer Without Streaks: A Controlled Jelly Polish Layering Method
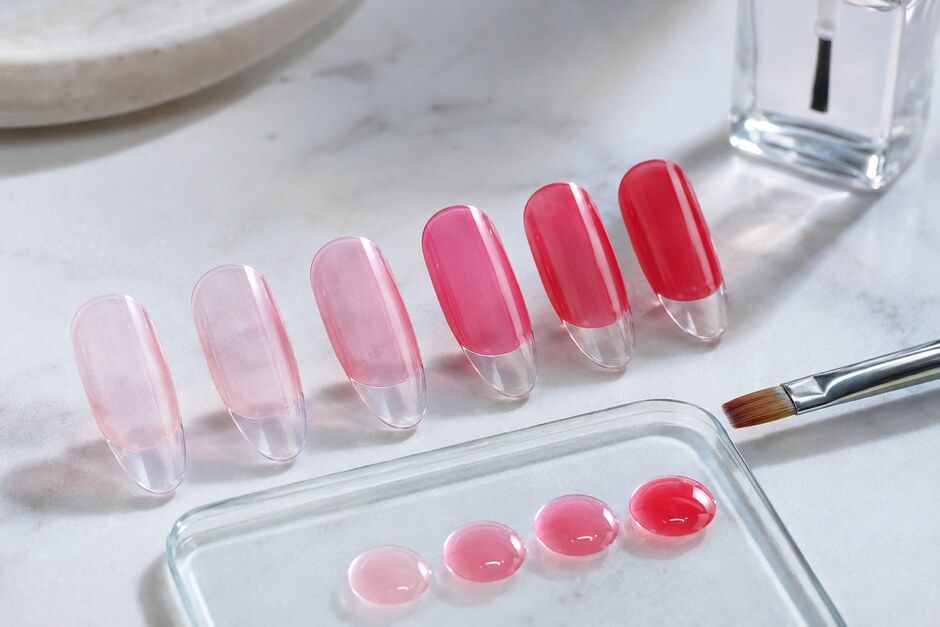
Sheer and jelly polishes reveal every decision underneath them. Their transparency creates depth, but it also exposes uneven pressure, overloaded brush strokes, and areas that were touched after they began to set. The solution is not always another coat. Clean sheer application comes from preparing a smooth surface, controlling how much product reaches the nail, and allowing each layer to complete its own drying or curing process.
Practice on clear display tips first, especially when using an unfamiliar formula. Regular lacquer and gel products behave differently, so follow the instructions for the exact system in use.
Prepare for reflection, not thickness
Transparent color magnifies surface irregularities. Shape the free edge and prepare the nail according to the product guidance. Remove dust and avoid leaving fibers behind. Do not use a thick color coat to hide texture; it can create flooding, wrinkling, slow drying, or incomplete curing.
If a compatible smoothing base is part of the system, apply it evenly and let it finish as directed. The reflective highlight on the base should travel cleanly from one side to the other. A broken highlight often predicts a broken sheer coat.
Load the brush deliberately
Wipe one side of the brush against the bottle neck, leaving a controlled bead on the other side. The bead should be large enough to cover the nail without repeated dipping, but small enough that it does not run toward the sidewalls.
Place the first contact slightly away from the cuticle area, guide the product carefully toward the boundary, and then pull it to the free edge. Use a few confident strokes. Constantly brushing back through a layer that has begun to level creates drag marks.
Think of the first coat as a tint
The first sheer coat may look pale and slightly imperfect. Its job is to establish a thin, even film—not final opacity. Keep brush pressure light so the bristles float over the surface rather than scraping product away from the center.
Check the side profile. A bulge near the free edge or sidewall means the coat is not truly thin. Correct excess immediately using the system’s recommended method, and keep wet or uncured product away from skin.
Let each layer finish completely
With regular polish, wait the recommended interval and avoid pressing a new coat into a soft layer. With gel, use the specified lamp, time, and compatible products; do not guess or mix systems that are not designed to work together. An under-cured layer is not repaired by adding more product on top.
Apply the second coat with the same stroke direction as the first. The color should deepen while the lighter center and reflective quality remain visible. If the desired result is a true jelly look, stop before the layers become visually heavy.
Build depth with intentional placement
Transparency can be used for more than full coverage. Add a second or third layer only to selected areas to create a soft gradient, framed edge, or stained-glass overlap. Work in simple shapes and keep the boundaries clean. Multiple translucent colors can turn muddy when too many layers overlap.
Test combinations on separate tips. A pink over amber behaves differently from amber over pink because the upper layer controls the immediate surface impression.
Diagnose streaks by their shape
- Long pale channels: brush pressure was too strong or the layer was overworked.
- Dark pools at the sides: too much product was loaded or the hand position encouraged runoff.
- Patchy dull areas: the previous layer may not have finished, or the product was repeatedly disturbed.
- Visible dust points: the workspace, wipe, or brush introduced fibers between layers.
When a coat is already setting, stop touching it. Let it finish, evaluate the result, and correct only with a compatible next step. Trying to chase every streak while the surface is changing usually creates new ones.
Protect the transparent effect
Apply the appropriate top finish in an even layer and seal the free edge only as directed for the product. The finish should enhance the continuous highlight rather than compensate for an uneven structure below.
Sheer polish rewards restraint. A smooth base, measured brush load, light pressure, and complete intervals between coats create depth with less product—and preserve the luminous quality that makes jelly color distinctive.